Yorkie's Primitives Handmade Goods

Wednesday, July 29, 2009

My own space

I have wanted to have a booth somewhere for a long time. But unfortunately there are no craft stores in my town anymore. So I asked my daughter if I could set up a table with crafts on it to sell at her daycare. I am giving her a percentage of each sell to go towards new playground equipment. Just wanted to share a pic of my table to see what you think. I am working on some Halloween crafts now to add to it. Here's a pic. Until next time...

Friday, July 24, 2009

Finally Got My Curtains

For those of you who have read my previous posts, you know that we remodeled my living room in April. Then I bought new furniture. Well all that was missing was curtains.

I haven't had curtains in my living room for over 15 years. Just couldn't find any that I liked. But since I had new furniture, I really wanted new curtains. So I started looking through magazines to see if any jumped out at me. Well I found them but when I totaled up the price for 4 windows, I was shocked. It was going to cost around $600.00 dollars!! So there went those curtains.
And then I thought well I'll just make them. I searched Wal Mart, Joann's Fabrics and Hobby Lobby for blue and chocolate fabric but there was none. So I decided to see what I could find in curtains in stores. Once again, the only store around that had chocolate and blue was Lowe's and believe it or not, they wanted $29.99 per panel, which meant $60.00 per window! Well whoever came up with selling one panel for drapes is crazy. I refused to buy them just for the principal of this being another way of ripping off the public.
Then last month I finally checked Wal Mart again and found the perfect curtains except they had the loops on top to hang them by and that is not what I wanted. I wanted a ruffle on top. So I decide to rig them the way I wanted. And I did.
First I cut the loops off the top and saved them for drawbacks. Then I sewed a strip of muslin on the back right under the top hem to push the rods through. And to get the middle section, I purchased an extra set of the chocolate curtains and cut them into strips and sewed them on so that I could pull them up for the shade. It has taken me 3 months to find them, but I just love the way they turned out! And I bought them for less than $90.00. The lesson to be learned from this is to never give up. When they don't sell exactly what you want, use your imagination to fix it your way. See what you think. Until next time...

Tuesday, July 14, 2009

How to Print on Fabric Tutorial

Material Needed

Fabric to print on
Reynolds Freezer Paper
Label or Design to print

Before I start, let me explain a few things. First you cannot print directly on dark fabric. I have tried this and it won't show up. You have to use either muslin or white or off white cotton. It has to be light colored and of muslin weight. Next, I tried the cheaper off brand freezer paper and it doesn't work either. It just jams up in the printer. Third, if you want your fabric to be grundgy, stain if befor you do anything else. DO NOT USE CINNAMMON OR SPICES because it will ruin your printer. And last, you can only print on fabric as large as the paper your printer will accept.
I am going to make a candle dittie bag in my first lesson to show you how it works. This method will work on any project, such as doll aprons, pot holders, etc, just the same as a dittie bag. I just need to make some to sell anyway.LOL
To begin, choose the label or design that you want to print on fabric. Next stain your fabric. After it dries, iron out any wrinkles so that it is as smooth as a piece of copy paper. I cut my fabric about 2 inches longer and wider than the paper size that I am using so that I can get a smooth cut at the end. For this project I am using a regular piece of copy paper as my guide so I cut my fabric 10" X 13".
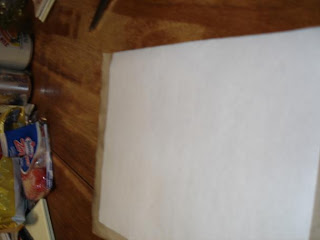
Now you need take a piece of copy paper and trace it on the dull side of the freezer paper. I tried to take a pic but it wouldn't show up. After you trace the paper, cut on the lines to get your freezer paper the exact size.
Take the SHINY side of the freezer paper that you just cut out and place it in the middle, on the wrong side of of the fabric that you have stained and ironed. Now iron the shiny side to the fabric. I just take the iron and rub over the paper. Make sure that the entire piece of freezer paper has stuck to the entire piece of fabric.


Now carefully cut the fabric to the size of the paper. After you finish this, your fabric is ready to print.


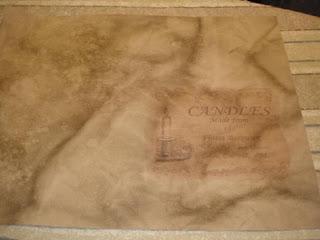
To print: First you need to decide what size you want the design to be so that it fits appropriately. Download the design into whichever program you use and resize it if needed. For this project, I used Printmaster 21 and made the label a little smaller so it would fit. Then I used the program to make the design look faded and wrinkled to give the effect I wanted.
After you download it, make sure you place the design in the position that you want it to be on the fabric. Mine needed to be a little lower than the middle so I can sew it and place a draw string when I am finished. So I brought the design in with the paper turned longways. When you think you have it where you want it, copy it on paper first. That way if you need to make changes, your fabric is not messed up. (I learned this the hard way.) After you have printed it on paper, if it is in the proper place it is time to print the fabric.


Now here is the part that is difficult for me to explain. You have to know which side of the paper your printer prints on. My printer prints on the bottom side of the paper that is in the tray. So I have to lay my fabric on the bottom when I print. If your printer prints on the top, lay your fabric on the bottom. If you are not sure which side your printer prints on, take a blank piece of paper and place and X mark in one corner and print it first. Lay the X mark on top so you will know which side this printed on.


After you have printed on the fabric, just peel the reynolds freezer paper off and you are ready to do what you want with your fabric. That's all there is to it.

Monday, July 13, 2009

Look what I made!

First let me say that I am so sorry for being so late posting. I promised two ladies that I would post a tutorial on how to print on fabric and I will be doing that tomorrow. I am so sorry it took me so long, but my back went out (arthritis), and for a week I was in so much pain all I did was take pain medication and sleep on heat.

It has quit hurting some but still flares up if I do too much so I am forced to take it slower until it decides to quit hurting. I hope you will understand and forgive me.
Now I do want to show you what I made. My friend Nancy was kind enough to show me how to make these and tell me where to buy the items I needed to finish them. I have made 8 soap dispensers for liquid soap and put primitive labels on them. I just love the way they turned out! This will be so cute in a primitive bathroom!
I have made two of each label. One with a rusty lid and black dispenser and one with a zinc lid and tan dispenser. I will be selling these on etsy starting tomorrow or if you would like one, just email me at valerie999@comcast.net and you can buy it from my blog. Here's the pic of all 8 of them. Until next time...

I Got A Surprise!

In June, the Prim Sister's Talk Radio Show had a red, white and blue swap. I got Vicky's name, Nancy got mine and Vicky got Nancy's. Well I posted a picture of the wonderful gifts that Nancy sent me and then one day I got a package from Vicky. Well my first instinct was that Vicky sent me Nancy's accidently.LOL But when whe was told that she said no that Nancy got one too. So as a Great Surprise she sent me one too. I was thrilled and can't wait to show you what she sent me. This was just too sweet. But thanks Vicky, I LOVE IT!!! Look at what I got. Isn't this just adorable? I just love the star and the crown! And it smells sooo good!Until next time...


Oh and be sure and stop by Vicky's blog at http://www.oldehomesteadbarn.blogspot.com/. You will laugh unti you cry at her last two posts! Way to go Vicky!

Sunday, July 5, 2009

Blog giveaway

Sweet Meadows Farm is having a really cute doll giveaway on her blog. Be sure and visit and sign up for the drawing. www.sweetmeadowsfarm.blogspot.com. Until next time...